
Text: Hideyuki Goto
This is the third in a series of articles explaining the procedure for installing Kitako's 164cc NEO Bore Up KIT on an early model Honda Grom 125 (2013-2017).
The cam sprocket was removed with the cylinder head removed in the previous installment, leaving the cam chain protruding from the cylinder. The cylinder contains a piston connected to the crankshaft via a connecting rod. If excessive force is applied when removing the cylinder or piston, the crankshaft, and other parts may be affected.
The cam chain also rests on the crankshaft, so be careful not to move the piston if it is moved carelessly.

The kit to be assembled is Kitako's 164cc NEO Bore Up Kit. This time, we will proceed to remove the cylinder and piston.
Cam chain guide removal
Before the cylinder can be removed, the cam chain guide installed inside the cylinder must be removed. The cam chain guide is held in place by the cylinder's cam chain guide roller pin bolt, so the cylinder can be pulled out by removing this and the guide roller.

(1) The cylinder head has been removed in the previous operation, and the piston tops are now visible.

(2) Remove the cylinder head gasket; note that four stud bolts go through the gasket.

(3) Remove the cam chain guide roller Once the cylinder head gasket is removed.

(4) Remove the cam chain guide roller pin bolt on the left side of the cylinder. This bolt was loosened in the second step (16).

(5) Set the socket wrench on the bolt and turn it to pull out the cam chain guide roller pin bolt.

(6) Since the cam chain guide roller is inside the cylinder, loosen the cam chain guide roller pin bolt while inserting your finger and holding it down.

(7) When the cam chain guide roller pin bolt is loosened to some extent, pull out the bolt while holding the cam chain guide roller so it will not fall off.

(8) Remove the cam chain guide roller pin bolt from the cylinder after removing the cam chain guide roller.

(9) Removed cam chain guide roller and roller pin bolt. The cam chain guide roller pin bolt contains a copper washer.
Cylinder removal
Remove the cylinder. When pulling the cylinder out, care should be taken to put as little load as possible on the stud bolts and pistons. The cam chain should also be pulled out of the cylinder before the cylinder is completely removed from the stud bolts.

(10) Remove the cylinder. Oil leaks from the gap between the cylinder and the crankcase when removing the cylinder, so an oil tray should be placed underneath.

(11) Remove the cylinder from the stat bolt. If the cylinder sticks, lightly impact it from both sides with a plastic hammer.

(12) Before completely removing the cylinder from the stud bolt, pull the cam chain from the cylinder and let it drop down.

(13) When the piston becomes visible, slowly pull out the cylinder while keeping your hand on the piston so that the piston does not hit the stud bolt too hard.

(14) Pull the cylinder out from the stud bolt. Be careful not to hit the front fender, etc. when pulling it out.

(15) The cylinder has been removed. Be careful not to drop it because it is heavy, and place it on a tray or something similar to prevent oil from dripping out.

(16) The knock pin may come off, so if it does, be sure to retrieve it and store it with the cylinder.
Piston pin clip removal
The piston pin that attaches the piston to the connecting rod is held in place by a piston pin clip. This piston pin clip is set in a groove on the piston using tension, so it is removed by grabbing the end with a thin-tipped tool such as a radio plier and pulling it out.

(17) The cylinder is removed, exposing the piston attached to the connecting rod.

(18) The piston is connected to the connecting rod by a piston pin, which is fastened with a piston pin clip.

(19) The piston pin clip is under strong tension and may fly off when removed. To prevent it from entering the crankcase at that time, stuff it with a rag to protect it.

(20) The piston pin clip is set in the groove of the piston, and there is a partial notch in the groove where the piston pin clip can be seen.

(21) Grasp the piston pin clip with radio pliers or the like, turn it, and bring the end of the piston pin clip to the notch.

(22) Bringing the end of the piston pin clip to the notch. The piston pin clip is difficult to turn, so grasp it firmly and turn it little by little.

(23) Grasp the end of the piston clip and pull it outward while turning it. The clip may fly off at the moment it is removed, so hold it firmly while working.

(24) A piston clip that has been removed. Since it has a C shape with a mouth in one direction, it can be removed from the piston groove by shrinking this mouth part.
Piston pin puller set
The piston pin can be pushed off with the fingers, but in most cases, it is stuck tightly and cannot be pulled out. In such cases, a special tool called a piston pin puller is used to pull it out little by little.
First, the piston pin puller is set on the piston.

(25) The piston pin may come off by pushing it with the finger, but it may also be too hard to move by pushing it with the finger.

(26) If it is too hard to pull out, use a special tool called a piston pin puller. This is a self-made tool, but there are commercially available ones on the market, so it is recommended to use them.

(27) Remove the bolt in the center of the piston pin puller from the plate by removing the nut and washer.

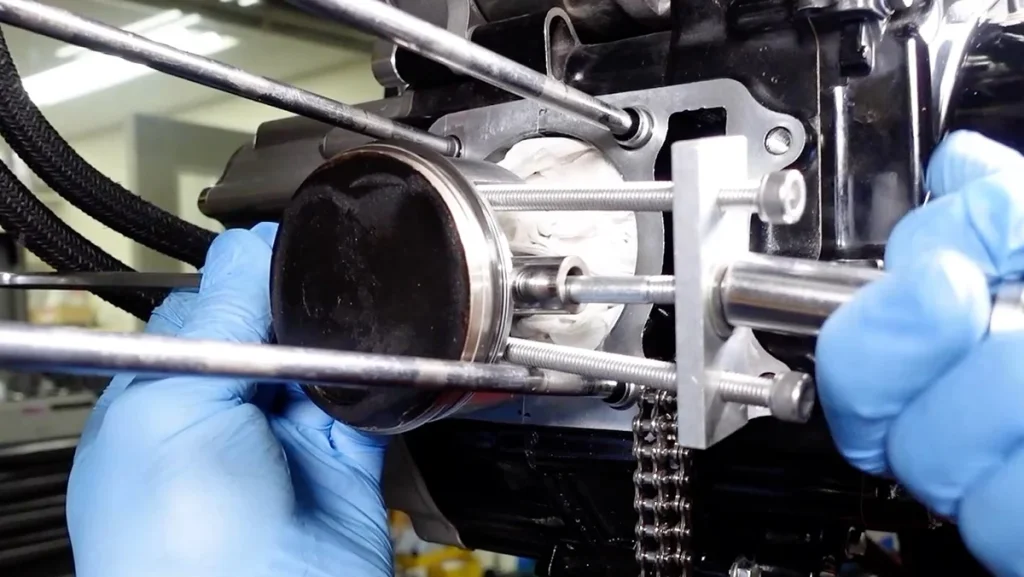
(28) Set the tips of the two bolts of the piston pin puller against the flat area next to the piston pin.

(29) Pass the removed bolt through the piston pin from the opposite side of where the piston pin puller was set.

(30) When the tip of the bolt comes out, pass it directly through the hole in the middle of the piston pin puller.

(31) Turn the two bolts on the left and right to match the length of the piston pin to be pulled out. Adjust the two bolts so that they are the same length.

(32) Set and secure the Allen key to the bolt set from the opposite side. Be careful not to put a load on the connecting lot.
Piston removal
When removing the piston pin, care should be taken not to strain the connecting rod by applying excessive force.
Once the piston pin is removed, the piston is released from the connecting rod. Once the piston is removed, the disassembly work for installing the bore-up kit is complete.
(33) As the wrench is set on the nut and tightened, the piston pin gradually comes out toward the front.
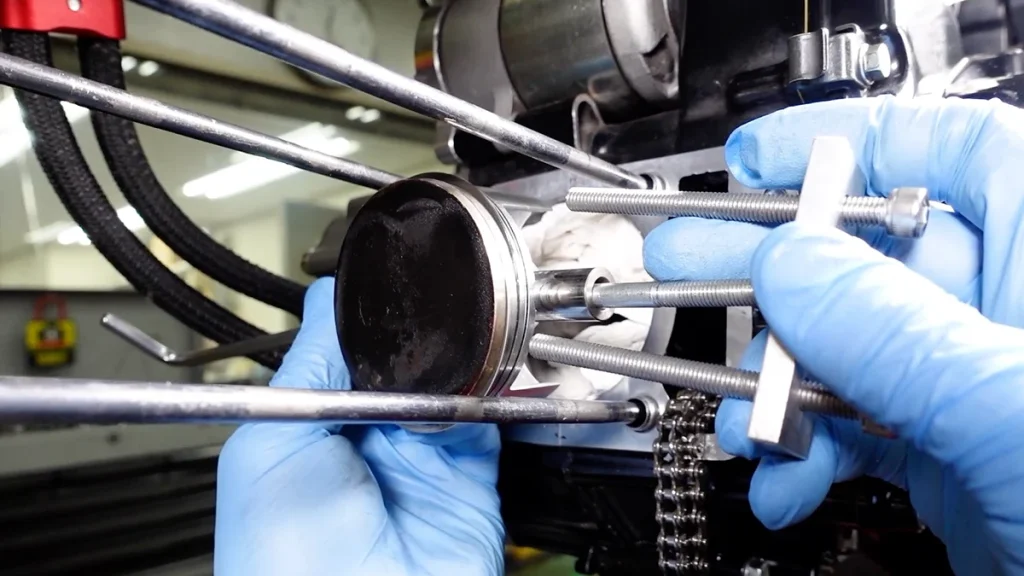
(34) Once the piston pin is out, remove the nut and washer from the middle bolt and remove the piston pin puller.
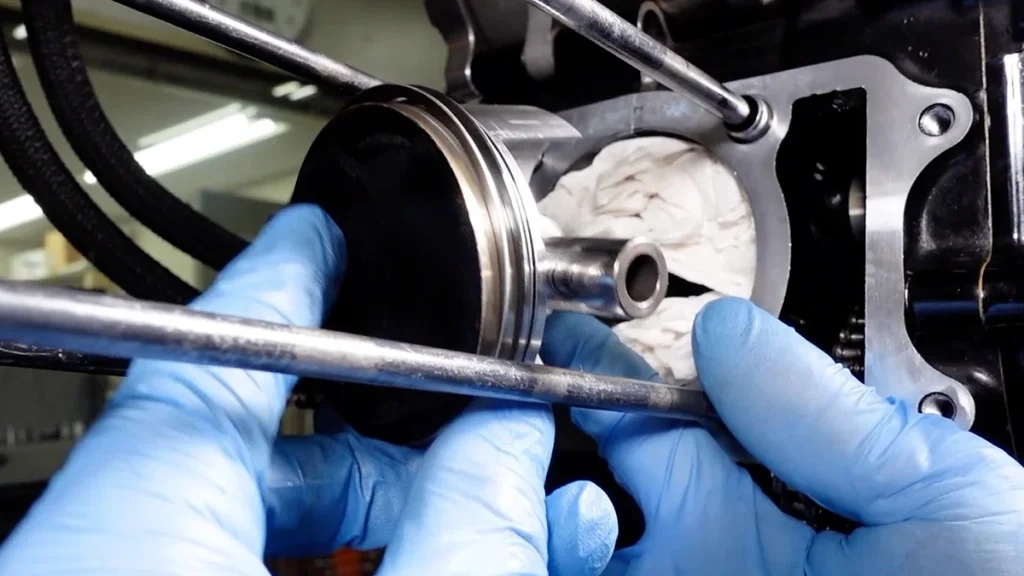
(35) Remove the piston from the connecting rod by pulling out the bolt set from the opposite side after the piston pin puller has been removed.
Be careful not to drop the piston.
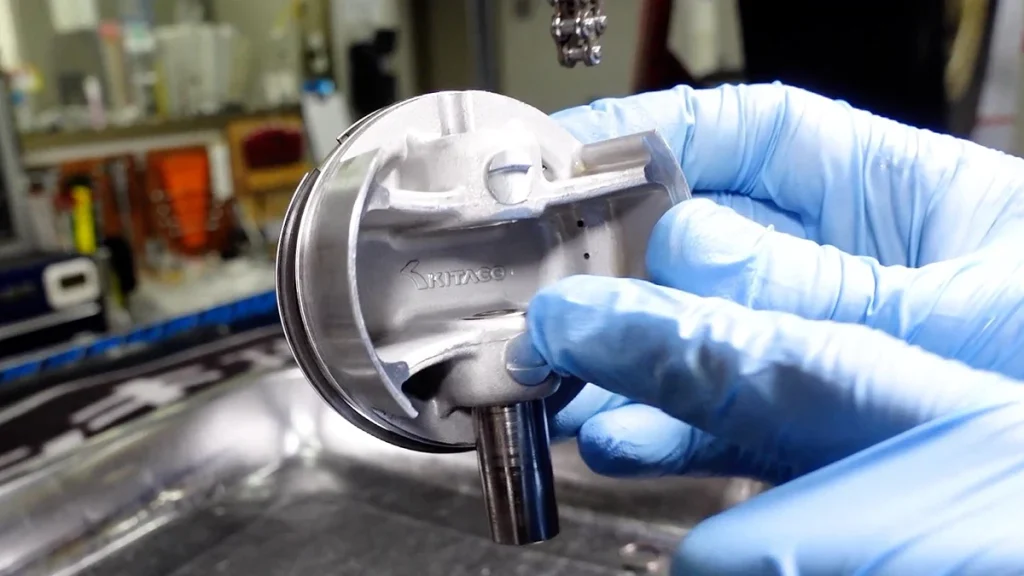
(36) Keep the piston removed from the connecting rod by placing it on a tray or the like.

